m (added back the word "great" as used by Andre of Astora in his description which is it based off of.) Tag: rte-wysiwyg |
m (added note about how Sen's Fortress got it's name through a translation error) Tag: Visual edit |
||
| (31 intermediate revisions by 18 users not shown) | |||
| Line 1: | Line 1: | ||
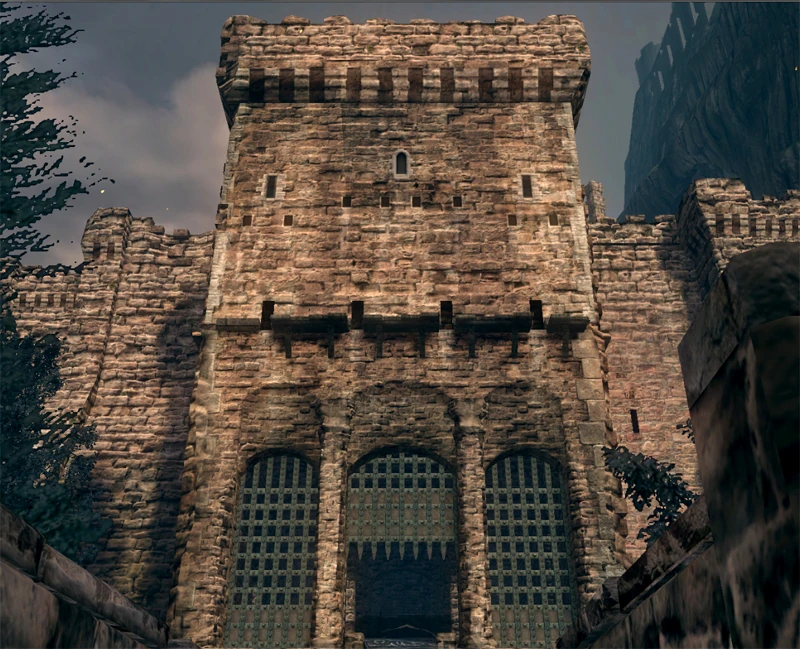
| + | [[File:Sens fortress02.jpg|right|300px]] |
||
| − | + | {{Quoteleft|Sen's Fortress is an old proving grounds built by the ancient gods. It is the only route leading to great Anor Londo. Of course, most fools can't even find their way into that fortified deathtrap...|[[Andre of Astora]]}} |
|
| − | '''Sen |
+ | '''Sen's Fortress''' is a [[location]] in ''[[Dark Souls]]''. |
==Description== |
==Description== |
||
| − | Sen's Fortress is large, stone fort inhabited by an assortment of enemies, including |
+ | Sen's Fortress is a large, stone fort inhabited by an assortment of enemies, including [[Serpent]]s, [[undead]] knights and [[Titanite Demon]]s. It is notable for its many [[traps]] and [[environmental hazards]] that line the hallways, and is said to be an old proving grounds built by the ancient gods. It is the only route that leads directly to great [[Anor Londo]]. |
| − | It can be found by crossing the stone bridge leading out of the enclosure in the [[Undead Parish]] where [[Andre of Astora]] is working. The fort can only be entered after ringing both of the [[Bells of Awakening]]. |
+ | It can be found by crossing the stone bridge leading out of the enclosure in the [[Undead Parish]] out of a doorway in front of the [[Bonfire (Dark Souls)|bonfire]] before where [[Andre of Astora]] is working. The fort can only be entered after ringing both of the [[Bells of Awakening]]. |
==Bonfire== |
==Bonfire== |
||
| − | The only [[ |
+ | The only [[Bonfire (Dark Souls)|bonfire]] in the area is near the top of the fortress. In the area where the [[Giant]] throws firebombs down toward the player, it is reached by dropping off of the edge of the second platform where a piece of the wall is broken. |
| + | |||
| + | Another way to explain where it is as soon as you see the first giant across from you at the top and after going up the first flight of stone steps, you should see a break in the wall on your right near the corner. Drop down to it and you'll be at the bonfire. |
||
==Characters== |
==Characters== |
||
*[[Big Hat Logan]] - He is found imprisoned behind a destructible wall. Freeing him requires the [[Cage Key]] or [[Master Key]]. |
*[[Big Hat Logan]] - He is found imprisoned behind a destructible wall. Freeing him requires the [[Cage Key]] or [[Master Key]]. |
||
| − | *[[Black Iron Tarkus]] <small>([[ |
+ | *[[Black Iron Tarkus]] <small>([[White Phantom]])</small> - His summon sign is in a tower past the [[fog door]] leading to the [[Iron Golem]] boss. |
| − | *[[Crestfallen Merchant]] <small>([[ |
+ | *[[Crestfallen Merchant]] <small>([[merchant]])</small> - He is located on the outdoor roof area, in a tower which is across a gap on the intersecting walkway. |
| − | * |
+ | *[[Siegmeyer of Catarina]] - He is initially encountered outside the gate to Sen's Fortress, and can later be found inside the fortress by the first boulder obstacle, near the [[Shotel]]. |
==Enemies== |
==Enemies== |
||
===Characters=== |
===Characters=== |
||
| − | *[[Griggs of Vinheim]] <small>( |
+ | *[[Griggs of Vinheim]] <small>([[hollow]]ed)</small> |
| − | *[[Undead Prince Ricard]] <small>( |
+ | *[[Undead Prince Ricard]] <small>(hollowed)</small> |
| + | |||
===Respawning=== |
===Respawning=== |
||
*[[Balder Knight]] |
*[[Balder Knight]] |
||
*[[Berenike Knight]] |
*[[Berenike Knight]] |
||
| − | *[[Giant]] <small>( |
+ | *[[Giant]] <small>(operating the boulder mechanism)</small> |
*[[Serpent Mage]] |
*[[Serpent Mage]] |
||
*[[Serpent Soldier]] |
*[[Serpent Soldier]] |
||
| − | *Serpent Mage <small>( |
+ | *Serpent Mage <small>(gravelorded)</small> |
| + | |||
| − | ===Non- |
+ | ===Non-respawning=== |
| − | *[[Giant|Giant Gatekeeper]] <small>(Behind an [[Illusory Wall|Illusory wall]] after climbing the ladder from the [[Titanite Demon]]s)</small> |
||
| − | *[[ |
+ | *[[Giant Gatekeeper]] <small>(behind an [[illusory wall]] after climbing the ladder from the [[Titanite Demon]]s)</small> |
| + | *[[Giant Firebomber]] <small>(top of fortress)</small> |
||
*[[Mimic]] |
*[[Mimic]] |
||
*[[Titanite Demon]]s |
*[[Titanite Demon]]s |
||
| + | |||
===Bosses=== |
===Bosses=== |
||
*[[Iron Golem]] |
*[[Iron Golem]] |
||
| − | ==Notable |
+ | ==Notable items== |
===Armor=== |
===Armor=== |
||
| − | *[[Black Sorcerer Set]] <small>( |
+ | *[[Black Sorcerer Set]] <small>(corpse)</small> |
| + | |||
===Keys=== |
===Keys=== |
||
| − | *[[Cage Key]] <small>( |
+ | *[[Cage Key]] <small>(corpse)</small> |
| + | |||
===Miscellaneous=== |
===Miscellaneous=== |
||
| − | *[[Divine Blessing]] <small>( |
+ | *[[Divine Blessing]] <small>(chest)</small> |
| + | |||
===Rings=== |
===Rings=== |
||
| − | *[[Covetous Gold Serpent Ring]] <small>( |
+ | *[[Covetous Gold Serpent Ring]] <small>(corpse)</small> |
| − | *[[Flame Stoneplate Ring]] <small>( |
+ | *[[Flame Stoneplate Ring]] <small>(chest)</small> |
| − | *[[Rare Ring of Sacrifice]] <small>( |
+ | *[[Rare Ring of Sacrifice]] <small>(chest)</small> |
| − | *[[Ring of Steel Protection]] <small>( |
+ | *[[Ring of Steel Protection]] <small>(chest)</small> |
| − | *[[Slumbering Dragoncrest Ring]] <small>( |
+ | *[[Slumbering Dragoncrest Ring]] <small>(corpse)</small> |
| + | |||
===Sorceries=== |
===Sorceries=== |
||
| − | *[[Hush]] <small>( |
+ | *[[Hush]] <small>(corpse)</small> |
| + | |||
===Souls=== |
===Souls=== |
||
| − | *[[Core of an Iron Golem]] <small>( |
+ | *[[Core of an Iron Golem]] <small>(drop)</small> |
| − | *[[Soul of a Hero]] <small>( |
+ | *[[Soul of a Hero]] <small>(corpse)</small> |
| + | |||
| − | ===Upgrade |
+ | ===Upgrade materials=== |
| ⚫ | |||
| − | *[[ |
+ | *[[Demon Titanite]] x6 <small>([[Titanite Demon]]s - drop)</small> |
| − | *[[Titanite |
+ | *[[Large Titanite Shard]] <small>x2 (chest); x4 (corpses)</small> |
| ⚫ | |||
| + | |||
===Weapons=== |
===Weapons=== |
||
| − | *[[Lightning ( |
+ | *[[Lightning (upgrade path)|Lightning]] [[Spear]] <small>([[Mimic]] - drop)</small> |
| − | *[[Ricard's Rapier]] <small>([[Undead Prince Ricard]] - |
+ | *[[Ricard's Rapier]] <small>([[Undead Prince Ricard]] - drop)</small> |
| − | *[[Scythe]] <small>( |
+ | *[[Scythe]] <small>(corpse)</small> |
| − | *[[Shotel]] <small>( |
+ | *[[Shotel]] <small>(corpse)</small> |
| − | *[[Sniper Crossbow]] |
+ | *[[Sniper Crossbow]] and [[Sniper Bolt]] x12 <small>(corpse)</small> |
| + | |||
| + | ==Notes== |
||
| + | * It is possible to enter Sen's Fortress before ringing the [[Bells of Awakening]] by using a glitch that prevents the closed gate from loading. |
||
| + | * The fortress' English name is a translation error. The Japanese name essentially translates to "Fortress of a thousand traps", but the Japanese word for thousand is "sen". There is no person named "Sen" the fortress is named after. |
||
==Gallery== |
==Gallery== |
||
| + | <gallery position="center" captionalign="center"> |
||
| − | <gallery> |
||
| − | + | sens fortress exterior.jpg|Opening the gate |
|
| − | + | Sens fortress interior.jpg|Interior |
|
| − | + | Trap Road.png|Traps |
|
| − | 10 Sen's Fortress.png|Map of Sen's Fortress |
+ | 10 Sen's Fortress.png|Map of Sen's Fortress interior |
| − | 11 Sen's Fortress Roof.png|Map of Sen's Fortress |
+ | 11 Sen's Fortress Roof.png|Map of Sen's Fortress exterior/roof |
</gallery> |
</gallery> |
||
| + | |||
| + | ==Videos== |
||
| + | [[File:Dark Souls How to pass Sen`s Fortress (Guide) + Bonfire|thumb|center|335px]] |
||
| + | |||
| + | ==References== |
||
| + | <references /> |
||
{{LocationsNav}} |
{{LocationsNav}} |
||
| + | [[pl:Forteca Sena]] |
||
Revision as of 18:50, 6 June 2020
- "Sen's Fortress is an old proving grounds built by the ancient gods. It is the only route leading to great Anor Londo. Of course, most fools can't even find their way into that fortified deathtrap..."
- — Andre of Astora
Sen's Fortress is a location in Dark Souls.
Description
Sen's Fortress is a large, stone fort inhabited by an assortment of enemies, including Serpents, undead knights and Titanite Demons. It is notable for its many traps and environmental hazards that line the hallways, and is said to be an old proving grounds built by the ancient gods. It is the only route that leads directly to great Anor Londo.
It can be found by crossing the stone bridge leading out of the enclosure in the Undead Parish out of a doorway in front of the bonfire before where Andre of Astora is working. The fort can only be entered after ringing both of the Bells of Awakening.
Bonfire
The only bonfire in the area is near the top of the fortress. In the area where the Giant throws firebombs down toward the player, it is reached by dropping off of the edge of the second platform where a piece of the wall is broken.
Another way to explain where it is as soon as you see the first giant across from you at the top and after going up the first flight of stone steps, you should see a break in the wall on your right near the corner. Drop down to it and you'll be at the bonfire.
Characters
- Big Hat Logan - He is found imprisoned behind a destructible wall. Freeing him requires the Cage Key or Master Key.
- Black Iron Tarkus (White Phantom) - His summon sign is in a tower past the fog door leading to the Iron Golem boss.
- Crestfallen Merchant (merchant) - He is located on the outdoor roof area, in a tower which is across a gap on the intersecting walkway.
- Siegmeyer of Catarina - He is initially encountered outside the gate to Sen's Fortress, and can later be found inside the fortress by the first boulder obstacle, near the Shotel.
Enemies
Characters
- Griggs of Vinheim (hollowed)
- Undead Prince Ricard (hollowed)
Respawning
- Balder Knight
- Berenike Knight
- Giant (operating the boulder mechanism)
- Serpent Mage
- Serpent Soldier
- Serpent Mage (gravelorded)
Non-respawning
- Giant Gatekeeper (behind an illusory wall after climbing the ladder from the Titanite Demons)
- Giant Firebomber (top of fortress)
- Mimic
- Titanite Demons
Bosses
Notable items
Armor
- Black Sorcerer Set (corpse)
Keys
- Cage Key (corpse)
Miscellaneous
- Divine Blessing (chest)
Rings
- Covetous Gold Serpent Ring (corpse)
- Flame Stoneplate Ring (chest)
- Rare Ring of Sacrifice (chest)
- Ring of Steel Protection (chest)
- Slumbering Dragoncrest Ring (corpse)
Sorceries
- Hush (corpse)
Souls
- Core of an Iron Golem (drop)
- Soul of a Hero (corpse)
Upgrade materials
- Demon Titanite x6 (Titanite Demons - drop)
- Large Titanite Shard x2 (chest); x4 (corpses)
- Titanite Chunk x2 (Giants - drop)
Weapons
- Lightning Spear (Mimic - drop)
- Ricard's Rapier (Undead Prince Ricard - drop)
- Scythe (corpse)
- Shotel (corpse)
- Sniper Crossbow and Sniper Bolt x12 (corpse)
Notes
- It is possible to enter Sen's Fortress before ringing the Bells of Awakening by using a glitch that prevents the closed gate from loading.
- The fortress' English name is a translation error. The Japanese name essentially translates to "Fortress of a thousand traps", but the Japanese word for thousand is "sen". There is no person named "Sen" the fortress is named after.
Gallery
")
")
")
")
")
Videos

References
| Lordran Locations |
|---|
| Abyss • Anor Londo • Ash Lake • Blighttown • Crystal Cave • Darkroot Basin • Darkroot Garden • Demon Ruins Depths • The Duke's Archives • Firelink Altar • Firelink Shrine • Kiln of the First Flame • Lost Izalith New Londo Ruins • Painted World of Ariamis • Quelaag's Domain • Sen's Fortress The Catacombs • The Great Hollow • Tomb of the Giants • Undead Burg Undead Parish • Valley of Drakes |
| Oolacile Locations |
| Battle of Stoicism • Chasm of the Abyss • Oolacile Sanctuary • Oolacile Township Oolacile Township Dungeon • Royal Wood • Sanctuary Garden |
| Other Locations |
| Northern Undead Asylum |