(→Notes) Tag: sourceedit |
(→Wares) Tag: sourceedit |
||
| Line 19: | Line 19: | ||
|- |
|- |
||
|1 |
|1 |
||
| − | |[[Soul Arrow (Dark Souls III)]] |
+ | |[[Soul Arrow (Dark Souls III)|Soul Arrow]] |
|1,000 |
|1,000 |
||
|- |
|- |
||
|1 |
|1 |
||
| − | |[[Great Soul Arrow (Dark Souls III)]] |
+ | |[[Great Soul Arrow (Dark Souls III)|Great Soul Arrow]] |
|2,000 |
|2,000 |
||
|- |
|- |
||
|1 |
|1 |
||
| − | |[[Heavy Soul Arrow (Dark Souls III)]] |
+ | |[[Heavy Soul Arrow (Dark Souls III)|Heavy Soul Arrow]] |
|2,000 |
|2,000 |
||
|- |
|- |
||
| Line 39: | Line 39: | ||
|- |
|- |
||
|1 |
|1 |
||
| − | |[[Soul Greatsword (Dark Souls III)]] |
+ | |[[Soul Greatsword (Dark Souls III)|Soul Greatsword]] |
|5,000 |
|5,000 |
||
|- |
|- |
||
| Line 47: | Line 47: | ||
|- |
|- |
||
|1 |
|1 |
||
| − | |[[Magic Weapon (Dark Souls III)]] |
+ | |[[Magic Weapon (Dark Souls III)|Magic Weapon]] |
|4,500 |
|4,500 |
||
|- |
|- |
||
|1 |
|1 |
||
| − | |[[Magic |
+ | |[[Magic Shield (Dark Souls III)|Magic Shield]] |
|4,500 |
|4,500 |
||
|- |
|- |
||
| Line 59: | Line 59: | ||
|- |
|- |
||
|1 |
|1 |
||
| − | |[[Aural Decoy (Dark Souls III)]] |
+ | |[[Aural Decoy (Dark Souls III)|Aural Decoy]] |
|2,000 |
|2,000 |
||
|- |
|- |
||
| Line 97: | Line 97: | ||
|- |
|- |
||
|1 |
|1 |
||
| − | |[[Cast Light (Dark Souls III)]] |
+ | |[[Cast Light (Dark Souls III)|Cast Light]] |
|1,000 |
|1,000 |
||
|- |
|- |
||
|1 |
|1 |
||
| − | |[[Repair (Dark Souls III)]] |
+ | |[[Repair (Dark Souls III)|Repair]] |
|2,000 |
|2,000 |
||
|- |
|- |
||
|1 |
|1 |
||
| − | |[[Hidden Body (Dark Souls III)]] |
+ | |[[Hidden Body (Dark Souls III)|Hidden Body]] |
|3,000 |
|3,000 |
||
|- |
|- |
||
|style="border-bottom:0px; border-radius:0 0 0 10px;"|1 |
|style="border-bottom:0px; border-radius:0 0 0 10px;"|1 |
||
| − | |[[Hidden Weapon (Dark Souls III)]] |
+ | |[[Hidden Weapon (Dark Souls III)|Hidden Weapon]] |
|style="text-align: center; border-bottom:0px; border-radius:0 0 10px 0;"|1,500 |
|style="text-align: center; border-bottom:0px; border-radius:0 0 10px 0;"|1,500 |
||
|} |
|} |
||
| Line 120: | Line 120: | ||
|- |
|- |
||
|1 |
|1 |
||
| − | |[[Homing Soulmass (Dark Souls III)]] |
+ | |[[Homing Soulmass (Dark Souls III)|Homing Soulmass]] |
|6,000 |
|6,000 |
||
|- |
|- |
||
|style="border-bottom:0px; border-radius:0 0 0 10px;"|1 |
|style="border-bottom:0px; border-radius:0 0 0 10px;"|1 |
||
| − | |[[Soul Spear (Dark Souls III)]] |
+ | |[[Soul Spear (Dark Souls III)|Soul Spear]] |
|style="text-align: center; border-bottom:0px; border-radius:0 0 10px 0;"|5,000 |
|style="text-align: center; border-bottom:0px; border-radius:0 0 10px 0;"|5,000 |
||
|} |
|} |
||
| Line 135: | Line 135: | ||
|- |
|- |
||
|1 |
|1 |
||
| − | |[[Homing Crystal Soulmass (Dark Souls III)]] |
+ | |[[Homing Crystal Soulmass (Dark Souls III)|Homing Crystal Soulmass]] |
|??? |
|??? |
||
|- |
|- |
||
|1 |
|1 |
||
| − | |[[Crystal Magic Weapon (Dark Souls III)]] |
+ | |[[Crystal Magic Weapon (Dark Souls III)|Crystal Magic Weapon]] |
|??? |
|??? |
||
|- |
|- |
||
|style="border-bottom:0px; border-radius:0 0 0 10px;"|1 |
|style="border-bottom:0px; border-radius:0 0 0 10px;"|1 |
||
| − | |[[Crystal Soul Spear (Dark Souls III)]] |
+ | |[[Crystal Soul Spear (Dark Souls III)|Crystal Soul Spear]] |
|style="text-align: center; border-bottom:0px; border-radius:0 0 10px 0;"|??? |
|style="text-align: center; border-bottom:0px; border-radius:0 0 10px 0;"|??? |
||
|} |
|} |
||
Revision as of 15:29, 22 May 2016
| This article is incomplete and requires immediate expansion. It is missing large portions of information and falls far below the wiki standard. Resolve this issue by adding the necessary information to make this page serviceable, then remove this template. |
- ""
- —
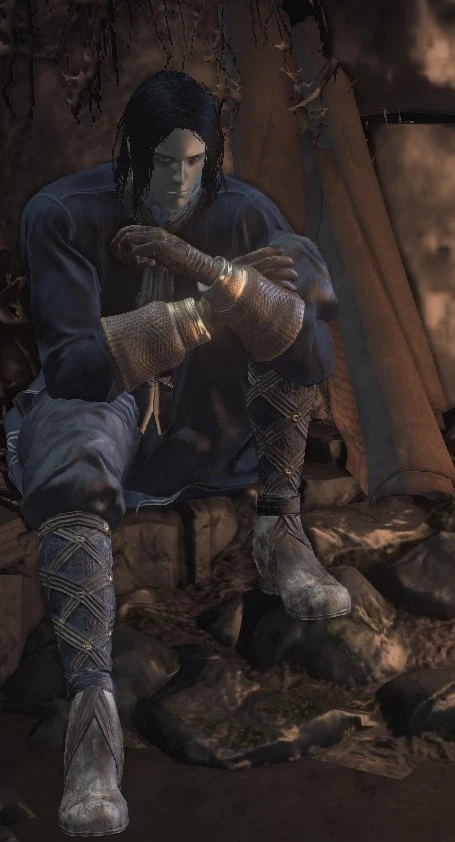
Orbeck of Vinheim is a character in Dark Souls III.
In-Game Description
- Once an assassin for hire, a sorcerer only in name, exiled from the Dragon School of Vinheim after turning Undead, on a journey to explore the depths of sorcery.
Location
Orbeck of Vinheim is initially located in the swamp building of the Road of Sacrifices on a top floor studying sorcery scrolls.
Wares
Default
| Available | Item | Cost |
|---|---|---|
| 1 | Soul Arrow | 1,000 |
| 1 | Great Soul Arrow | 2,000 |
| 1 | Heavy Soul Arrow | 2,000 |
| 1 | Great Heavy Soul Arrow | 4,000 |
| 1 | Farron Dart | 1,000 |
| 1 | Soul Greatsword | 5,000 |
| 1 | Farron Flashsword | 5,000 |
| 1 | Magic Weapon | 4,500 |
| 1 | Magic Shield | 4,500 |
| 1 | Spook | 2,000 |
| 1 | Aural Decoy | 2,000 |
Sage's Scroll
| Available | Item | Cost |
|---|---|---|
| 1 | Great Farron Dart | 2,000 |
| 1 | Farron Hail | 5,000 |
| 1 | Pestilent Mercury | 1,000 |
Golden Scroll
| Available | Item | Cost |
|---|---|---|
| 1 | Twisted Wall of Light | 6,000 |
| 1 | Cast Light | 1,000 |
| 1 | Repair | 2,000 |
| 1 | Hidden Body | 3,000 |
| 1 | Hidden Weapon | 1,500 |
Logan's Scroll
| Available | Item | Cost |
|---|---|---|
| 1 | Homing Soulmass | 6,000 |
| 1 | Soul Spear | 5,000 |
Crystal Scroll
| Available | Item | Cost |
|---|---|---|
| 1 | Homing Crystal Soulmass | ??? |
| 1 | Crystal Magic Weapon | ??? |
| 1 | Crystal Soul Spear | ??? |
Notes
- To recruit Orbeck, the player must have a minuium of 10 intelligence and must locate him in the Road of Sacrifices.
- Once Orbeck is recruited to Firelink Shrine, he will ask the player to bring scrolls as a deal for him to stay. If the player defeats any four bosses before bringing Orbeck a scroll, he will hold true to his deal and depart for the rest of the playthrough.
- If Orbeck has been recruited, Yuria of Londor will tell the player in dialogue to "deal with him" in reference to Orbeck. The player can either kill Orbeck and loot his ashes or wait until Orbeck leaves to the Grand Archives and loot his ashes. Either way, give the ashes to Yuria to receive the Morion Blade.
- After purchasing Aural Decoy, Farron Flashsword, Spook, and Pestilent Mercury, the player will be rewarded with Orbeck's gesture "Silent Ally" along with the Slumbering Dragoncrest Ring. When the player purchases four or more sorceries, Orbeck will gift the player with the Young Dragon Ring