No edit summary |
No edit summary |
||
| (4 intermediate revisions by 2 users not shown) | |||
| Line 32: | Line 32: | ||
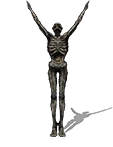
| style="text-align:center;" | Beckon |
| style="text-align:center;" | Beckon |
||
| style="text-align:center;" | [[Firelink Shrine (Dark Souls III)|Firelink Shrine]] |
| style="text-align:center;" | [[Firelink Shrine (Dark Souls III)|Firelink Shrine]] |
||
| − | | style="text-align:center;" | |
+ | | style="text-align:center;" | Exhaust [[Yoel of Londor]]'s dialogue once he has moved to Firelink Shrine. |
|- |
|- |
||
| style="text-align:center;" | [[File:Gestures (DSIII) - Bow.png|100px]] |
| style="text-align:center;" | [[File:Gestures (DSIII) - Bow.png|100px]] |
||
| Line 42: | Line 42: | ||
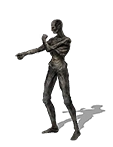
| style="text-align:center;" | By my sword |
| style="text-align:center;" | By my sword |
||
| style="text-align:center;" | [[Farron Keep]]<br />[[Irithyll of the Boreal Valley]] |
| style="text-align:center;" | [[Farron Keep]]<br />[[Irithyll of the Boreal Valley]] |
||
| − | | style="text-align:center;" | |
+ | | style="text-align:center;" | Automatically learned upon summoning [[Black Hand Gotthard]]. |
|- |
|- |
||
| style="text-align:center;" | [[File:Gestures (DSIII) - Call over.png|100px]] |
| style="text-align:center;" | [[File:Gestures (DSIII) - Call over.png|100px]] |
||
| Line 57: | Line 57: | ||
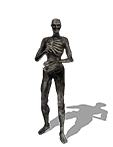
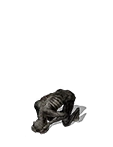
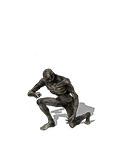
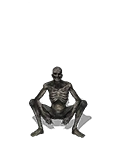
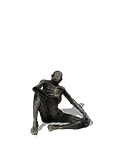
| style="text-align:center;" | Curl up |
| style="text-align:center;" | Curl up |
||
| style="text-align:center;" | [[Firelink Shrine (Dark Souls III)|Firelink Shrine]] |
| style="text-align:center;" | [[Firelink Shrine (Dark Souls III)|Firelink Shrine]] |
||
| − | | style="text-align:center;" | |
+ | | style="text-align:center;" | After giving [[Loretta's Bone]] to [[Greirat of the Undead Settlement]], reload the area and talk to him when he is in the pose. |
|- |
|- |
||
| style="text-align:center;" | [[File:Gestures (DSIII) - Darkmoon Loyalty.png|100px]] |
| style="text-align:center;" | [[File:Gestures (DSIII) - Darkmoon Loyalty.png|100px]] |
||
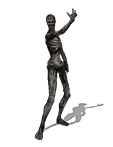
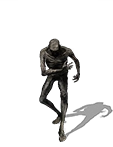
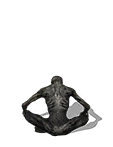
| style="text-align:center;" | Darkmoon Loyalty |
| style="text-align:center;" | Darkmoon Loyalty |
||
| style="text-align:center;" | [[Firelink Shrine (Dark Souls III)|Firelink Shrine]] |
| style="text-align:center;" | [[Firelink Shrine (Dark Souls III)|Firelink Shrine]] |
||
| − | | style="text-align:center;" | |
+ | | style="text-align:center;" | After giving the [[Dreamchaser's Ashes]] to the [[Shrine Handmaid]], reload the area and talk to [[Sirris of the Sunless Realms]]. |
|- |
|- |
||
| style="text-align:center;" | [[File:Gestures (DSIII) - Dignified bow.png|100px]] |
| style="text-align:center;" | [[File:Gestures (DSIII) - Dignified bow.png|100px]] |
||
| Line 72: | Line 72: | ||
| style="text-align:center;" | Duel bow |
| style="text-align:center;" | Duel bow |
||
| style="text-align:center;" | [[Farron Keep]]<br />[[Irithyll of the Boreal Valley]] |
| style="text-align:center;" | [[Farron Keep]]<br />[[Irithyll of the Boreal Valley]] |
||
| − | | style="text-align:center;" | |
+ | | style="text-align:center;" | Automatically learned upon summoning [[Londor Pale Shade]] at [[Farron Keep]] or [[Irithyll of the Boreal Valley]]. |
|- |
|- |
||
| style="text-align:center;" | [[File:Gestures (DSIII) - Hurrah!.png|100px]] |
| style="text-align:center;" | [[File:Gestures (DSIII) - Hurrah!.png|100px]] |
||
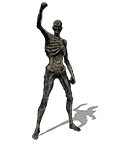
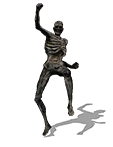
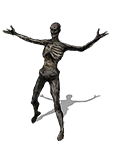
| style="text-align:center;" | Hurrah! |
| style="text-align:center;" | Hurrah! |
||
| style="text-align:center;" | [[Firelink Shrine (Dark Souls III)|Firelink Shrine]] |
| style="text-align:center;" | [[Firelink Shrine (Dark Souls III)|Firelink Shrine]] |
||
| − | | style="text-align:center;" | Exhaust [[Blacksmith Andre]]'s |
+ | | style="text-align:center;" | Exhaust [[Blacksmith Andre]]'s first two dialogues. |
|- |
|- |
||
| style="text-align:center;" | [[File:Gestures (DSIII) - Joy.png|100px]] |
| style="text-align:center;" | [[File:Gestures (DSIII) - Joy.png|100px]] |
||
| Line 97: | Line 97: | ||
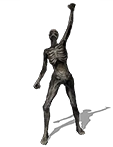
| style="text-align:center;" | My thanks! |
| style="text-align:center;" | My thanks! |
||
| style="text-align:center;" | [[Catacombs of Carthus]]<br />[[Smouldering Lake]] |
| style="text-align:center;" | [[Catacombs of Carthus]]<br />[[Smouldering Lake]] |
||
| − | | style="text-align:center;" | |
+ | | style="text-align:center;" | Automatically learned after defeating or dying to [[Knight Slayer Tsorig]]. |
|- |
|- |
||
| style="text-align:center;" | [[File:Gestures (DSIII) - Patches Squat.png|100px]] |
| style="text-align:center;" | [[File:Gestures (DSIII) - Patches Squat.png|100px]] |
||
| Line 127: | Line 127: | ||
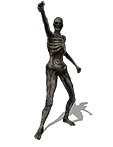
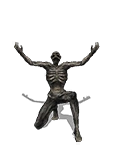
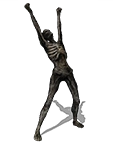
| style="text-align:center;" | Praise the Sun |
| style="text-align:center;" | Praise the Sun |
||
| style="text-align:center;" | [[Lothric Castle]] |
| style="text-align:center;" | [[Lothric Castle]] |
||
| − | | style="text-align:center;" | |
+ | | style="text-align:center;" | Interact with the [[Warrior of Sunlight (Dark Souls III)#Altar of Sunlight location|Altar of Sunlight]]. |
|- |
|- |
||
| style="text-align:center;" | [[File:Gestures (DSIII) - Prayer.png|100px]] |
| style="text-align:center;" | [[File:Gestures (DSIII) - Prayer.png|100px]] |
||
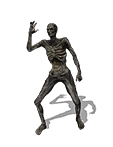
| style="text-align:center;" | Prayer |
| style="text-align:center;" | Prayer |
||
| style="text-align:center;" | [[Undead Settlement]] |
| style="text-align:center;" | [[Undead Settlement]] |
||
| − | | style="text-align:center;" | Received after agreeing to "touch" [[Irina of Carim]] in her cell |
+ | | style="text-align:center;" | Received after agreeing to "touch" [[Irina of Carim]] in her cell. |
|- |
|- |
||
| style="text-align:center;" | [[File:Gestures (DSIII) - Proper bow.png|100px]] |
| style="text-align:center;" | [[File:Gestures (DSIII) - Proper bow.png|100px]] |
||
| style="text-align:center;" | Proper bow |
| style="text-align:center;" | Proper bow |
||
| style="text-align:center;" | [[Farron Keep]] |
| style="text-align:center;" | [[Farron Keep]] |
||
| − | | style="text-align:center;" | Received upon summoning [[Yellowfinger Heysel]] as a white phantom near the [[Farron Keep#Bonfires|Keep Ruins bonfire]]. Heysel must have been defeated |
+ | | style="text-align:center;" | Received upon summoning [[Yellowfinger Heysel]] as a white phantom near the [[Farron Keep#Bonfires|Keep Ruins bonfire]]. Heysel must have been defeated at least once while invading, then the player must deepen their devotion to [[Rosaria's Fingers]] by providing at least one [[Pale Tongue]] to [[Rosaria, Mother of Rebirth]]. |
|- |
|- |
||
| style="text-align:center;" | [[File:Gestures (DSIII) - Prostration.png|100px]] |
| style="text-align:center;" | [[File:Gestures (DSIII) - Prostration.png|100px]] |
||
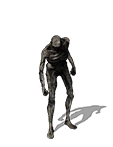
| style="text-align:center;" | Prostration |
| style="text-align:center;" | Prostration |
||
| style="text-align:center;" | [[Cathedral of the Deep]] |
| style="text-align:center;" | [[Cathedral of the Deep]] |
||
| − | | style="text-align:center;" | |
+ | | style="text-align:center;" | Confront [[Unbreakable Patches]] with the "You know who I am." option after he lowers the bridge in the [[Cathedral of the Deep]]. If not taught here, he will teach the gesture at [[Firelink Shrine (Dark Souls III)|Firelink Shrine]]. |
|- |
|- |
||
| style="text-align:center;" | [[File:Gestures (DSIII) - Quiet Resolve.png|100px]] |
| style="text-align:center;" | [[File:Gestures (DSIII) - Quiet Resolve.png|100px]] |
||
| Line 152: | Line 152: | ||
| style="text-align:center;" | Rejoice |
| style="text-align:center;" | Rejoice |
||
| style="text-align:center;" | [[Cathedral of the Deep]] |
| style="text-align:center;" | [[Cathedral of the Deep]] |
||
| − | | style="text-align:center;" | Provide the [[Catarina Set (Dark Souls III)|Catarina Set]] to [[Siegward of Catarina |
+ | | style="text-align:center;" | Provide the [[Catarina Set (Dark Souls III)|Catarina Set]] to [[Siegward of Catarina]] once he is trapped in the well outside of the [[Cathedral of the Deep#Bonfires|Cleansing Chapel]]. |
|- |
|- |
||
| style="text-align:center;" | [[File:Gestures (DSIII) - Rest.png|100px]] |
| style="text-align:center;" | [[File:Gestures (DSIII) - Rest.png|100px]] |
||
| Line 162: | Line 162: | ||
| style="text-align:center;" | Silent Ally |
| style="text-align:center;" | Silent Ally |
||
| style="text-align:center;" | [[Firelink Shrine (Dark Souls III)|Firelink Shrine]] |
| style="text-align:center;" | [[Firelink Shrine (Dark Souls III)|Firelink Shrine]] |
||
| − | | style="text-align:center;" | Talk to [[Orbeck of Vinheim]] after purchasing [[Aural Decoy (Dark Souls III)|Aural Decoy]], [[Farron Flashsword]], [[Pestilent Mist]] and [[Spook]] |
+ | | style="text-align:center;" | Talk to [[Orbeck of Vinheim]] after purchasing [[Aural Decoy (Dark Souls III)|Aural Decoy]], [[Farron Flashsword]], [[Pestilent Mist]] and [[Spook]]. |
|- |
|- |
||
| style="text-align:center;" | [[File:Gestures (DSIII) - Sleep.png|100px]] |
| style="text-align:center;" | [[File:Gestures (DSIII) - Sleep.png|100px]] |
||
| style="text-align:center;" | Sleep |
| style="text-align:center;" | Sleep |
||
| style="text-align:center;" | [[Undead Settlement]]<br />[[Irithyll of the Boreal Valley]] |
| style="text-align:center;" | [[Undead Settlement]]<br />[[Irithyll of the Boreal Valley]] |
||
| − | | style="text-align:center;" | Talk to [[Siegward of Catarina]] when he takes a nap after the fight with the [[Demon]]. Will also be taught upon giving him his armor at [[Cathedral of the Deep]]. |
+ | | style="text-align:center;" | Talk to [[Siegward of Catarina]] when he takes a nap after the fight with the [[Demon (Dark Souls III)|Demon]]. Will also be taught upon giving him his armor at [[Cathedral of the Deep]]. |
|- |
|- |
||
| style="text-align:center;" | [[File:Gestures (DSIII) - Stretch out.png|100px]] |
| style="text-align:center;" | [[File:Gestures (DSIII) - Stretch out.png|100px]] |
||
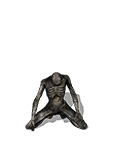
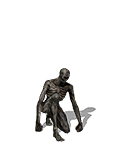
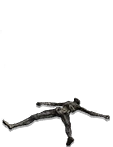
| style="text-align:center;" | Stretch out |
| style="text-align:center;" | Stretch out |
||
| style="text-align:center;" | [[Profaned Capital]] |
| style="text-align:center;" | [[Profaned Capital]] |
||
| − | | style="text-align:center;" | Taught by [[Laddersmith Gilligan]]'s corpse |
+ | | style="text-align:center;" | Taught by [[Laddersmith Gilligan]]'s corpse next to the [[Profaned Capital#Bonfires|Profaned Capital]] [[Bonfire (Dark Souls III)|bonfire]]. |
|- |
|- |
||
| style="text-align:center;" | [[File:Gestures (DSIII) - Toast.png|100px]] |
| style="text-align:center;" | [[File:Gestures (DSIII) - Toast.png|100px]] |
||
| style="text-align:center;" | Toast |
| style="text-align:center;" | Toast |
||
| style="text-align:center;" | [[Undead Settlement]] |
| style="text-align:center;" | [[Undead Settlement]] |
||
| − | | style="text-align:center;" | Talk to [[Siegward of Catarina]] after the fight with the [[Demon]]. Will also be taught upon giving him his armor at [[Cathedral of the Deep]]. |
+ | | style="text-align:center;" | Talk to [[Siegward of Catarina]] after the fight with the [[Demon (Dark Souls III)|Demon]]. Will also be taught upon giving him his armor at [[Cathedral of the Deep]]. |
|- |
|- |
||
| style="text-align:center;" | [[File:Gestures (DSIII) - Wave.png|100px]] |
| style="text-align:center;" | [[File:Gestures (DSIII) - Wave.png|100px]] |
||
| Line 187: | Line 187: | ||
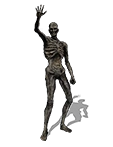
| style="text-align:center;" | Welcome |
| style="text-align:center;" | Welcome |
||
| style="text-align:center;" | [[Firelink Shrine (Dark Souls III)|Firelink Shrine]] |
| style="text-align:center;" | [[Firelink Shrine (Dark Souls III)|Firelink Shrine]] |
||
| − | | style="text-align:center;" | |
+ | | style="text-align:center;" | Once [[Cornyx of the Great Swamp]] has relocated to Firelink Shrine and talked to, reload the area and talk to him again. |
|} |
|} |
||
| Line 195: | Line 195: | ||
*The [[Fire Keeper (Dark Souls III)|Fire Keeper]] in [[Firelink Shrine (Dark Souls III)|Firelink Shrine]] will react with a corresponding gesture of her own if the player performs one in front of her. Depending on the gesture selected, she will respond with either a bow, a laugh, a twirl, or even by turning her head away in disapproval. |
*The [[Fire Keeper (Dark Souls III)|Fire Keeper]] in [[Firelink Shrine (Dark Souls III)|Firelink Shrine]] will react with a corresponding gesture of her own if the player performs one in front of her. Depending on the gesture selected, she will respond with either a bow, a laugh, a twirl, or even by turning her head away in disapproval. |
||
**Performing the "Path of the Dragon" gesture in front of her will cause her to continually twirl. |
**Performing the "Path of the Dragon" gesture in front of her will cause her to continually twirl. |
||
| − | *The "Stretch Out" gesture can allow the player to evade certain horizontal attacks. A notable example is the [[Demon Prince]] |
+ | *The "Stretch Out" gesture can allow the player to evade certain horizontal attacks. A notable example is the [[Demon Prince|Demon Prince']]s laser attack. |
[[Category:Dark Souls III: Gameplay Mechanics]] |
[[Category:Dark Souls III: Gameplay Mechanics]] |
||
Revision as of 08:36, 26 April 2020
- For gestures in Dark Souls, see Gestures.
- For gestures in Dark Souls II, see Gestures (Dark Souls II).
Gestures are a gameplay mechanic in Dark Souls III.
Description
Gestures are special animations the player can perform, often used as a means of communicating with other players. Among other things, gestures can be used to greet another player, thank them or making them aware of a nearby treasure.
The player starts the game with several gestures already at their disposal. These can be consulted and managed by pressing the ![]() button, bringing up a list with seven gestures ready for use. To perform a gesture, select it and press the action button (
button, bringing up a list with seven gestures ready for use. To perform a gesture, select it and press the action button (![]() /
/ ![]() ) or
) or ![]() /
/ ![]() .
.
As more gestures are learned, the player can press ![]() /
/ ![]() to open a complete menu of all the player's collected gestures. From here, gestures can either be added to the quick menu by selecting them or used directly by pressing
to open a complete menu of all the player's collected gestures. From here, gestures can either be added to the quick menu by selecting them or used directly by pressing ![]() /
/ ![]() .
.
Additional gestures can be learned throughout the course of the game. These are usually learned from other characters, after performing certain actions, or after defeating certain enemies.
There are a total of 33 gestures to be obtained in the game.
List of gestures
| Image | Name | Location | Availability |
|---|---|---|---|
|
Applause | Firelink Shrine | Talk to Ringfinger Leonhard after obtaining the Red Eye Orb. |
|
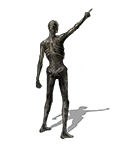
Beckon | Firelink Shrine | Exhaust Yoel of Londor's dialogue once he has moved to Firelink Shrine. |
|
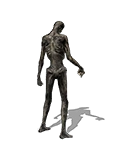
Bow | - | Default |
|
By my sword | Farron Keep Irithyll of the Boreal Valley |
Automatically learned upon summoning Black Hand Gotthard. |
|
Call over | Firelink Shrine | Trade an Avelyn, Coiled Sword Fragment, Divine Blessing, Eleonora, Hidden Blessing, Homeward Bone, Loretta's Bone, Mendicant's Staff, any Sacred Chime, Shriving Stone, Undead Bone Shard or Vertebra Shackle with the Nestling. |
|
Collapse | Firelink Shrine | Talk to Hawkwood the Deserter. |
|
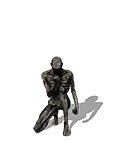
Curl up | Firelink Shrine | After giving Loretta's Bone to Greirat of the Undead Settlement, reload the area and talk to him when he is in the pose. |
|
Darkmoon Loyalty | Firelink Shrine | After giving the Dreamchaser's Ashes to the Shrine Handmaid, reload the area and talk to Sirris of the Sunless Realms. |

|
Dignified bow | Firelink Shrine | Talk to Yuria of Londor. |
|
Duel bow | Farron Keep Irithyll of the Boreal Valley |
Automatically learned upon summoning Londor Pale Shade at Farron Keep or Irithyll of the Boreal Valley. |
|
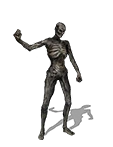
Hurrah! | Firelink Shrine | Exhaust Blacksmith Andre's first two dialogues. |
|
Joy | - | Default |
|
Jump for joy | - | Default |
|
Legion Etiquette | Farron Keep | Interact with the Old Wolf of Farron. |
|
My thanks! | Catacombs of Carthus Smouldering Lake |
Automatically learned after defeating or dying to Knight Slayer Tsorig. |
|
Patches Squat | Firelink Shrine | After speaking to Patches in the shrine, reload the area and speak to him while he is in the pose. If not taught here, will be taught by Amnesiac Lapp at the end of his quest. |

|
Path of the Dragon | Consumed King's Garden | Learned from the corpse of the Drakeblood Knight in the room past Oceiros, the Consumed King. |
|
Point down | - | Default |

|
Point forward | - | Default |
|
Point up | - | Default |
|
|
Praise the Sun | Lothric Castle | Interact with the Altar of Sunlight. |
|
Prayer | Undead Settlement | Received after agreeing to "touch" Irina of Carim in her cell. |

|
Proper bow | Farron Keep | Received upon summoning Yellowfinger Heysel as a white phantom near the Keep Ruins bonfire. Heysel must have been defeated at least once while invading, then the player must deepen their devotion to Rosaria's Fingers by providing at least one Pale Tongue to Rosaria, Mother of Rebirth. |

|
Prostration | Cathedral of the Deep | Confront Unbreakable Patches with the "You know who I am." option after he lowers the bridge in the Cathedral of the Deep. If not taught here, he will teach the gesture at Firelink Shrine. |
|
Quiet Resolve | Irithyll of the Boreal Valley | Talk to Anri of Astora at the Church of Yorshka. |
|
Rejoice | Cathedral of the Deep | Provide the Catarina Set to Siegward of Catarina once he is trapped in the well outside of the Cleansing Chapel. |
|
Rest | Cemetery of Ash | Rest at any bonfire for the first time. |
|
Silent Ally | Firelink Shrine | Talk to Orbeck of Vinheim after purchasing Aural Decoy, Farron Flashsword, Pestilent Mist and Spook. |
|
Sleep | Undead Settlement Irithyll of the Boreal Valley |
Talk to Siegward of Catarina when he takes a nap after the fight with the Demon. Will also be taught upon giving him his armor at Cathedral of the Deep. |
|
Stretch out | Profaned Capital | Taught by Laddersmith Gilligan's corpse next to the Profaned Capital bonfire. |

|
Toast | Undead Settlement | Talk to Siegward of Catarina after the fight with the Demon. Will also be taught upon giving him his armor at Cathedral of the Deep. |
|
Wave | - | Default |
|
Welcome | Firelink Shrine | Once Cornyx of the Great Swamp has relocated to Firelink Shrine and talked to, reload the area and talk to him again. |
Notes
- The "Darkmoon Loyalty" gesture is required to join the Blades of the Darkmoon covenant.
- The "Path of the Dragon" gesture is required to reach Archdragon Peak.
- The Fire Keeper in Firelink Shrine will react with a corresponding gesture of her own if the player performs one in front of her. Depending on the gesture selected, she will respond with either a bow, a laugh, a twirl, or even by turning her head away in disapproval.
- Performing the "Path of the Dragon" gesture in front of her will cause her to continually twirl.
- The "Stretch Out" gesture can allow the player to evade certain horizontal attacks. A notable example is the Demon Prince's laser attack.